Still have questions? Leave a comment

Checklist: Dissertation Proposal
Enter your email id to get the downloadable right in your inbox!
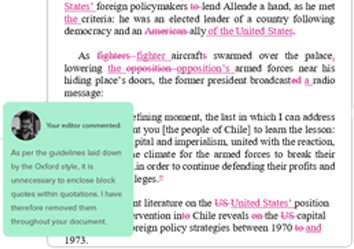
Examples: Edited Papers
Enter your email id to get the downloadable right in your inbox!
Need
Editing and
Proofreading Services?

How To Track Changes In Word: Accept, Hide & Disable Changes
 Apr 12, 2024
 9
min read
- Tags: Editing
Have you ever found yourself in the middle of a document review, grappling with feedback from multiple colleagues? Or perhaps you’re working on a manuscript and need to manage revisions from various contributors? Microsoft Word’s “Track Changes” feature is a powerful tool designed to make collaborative editing seamless.
Let’s learn what are Track Changes in MS Word, and how can you effectively use them to streamline your editing process!
What are Track Changes in Word?
Track changes in Word is a built-in feature that records every edit made to a document. From deletions to additions and formatting adjustments, it captures it all. It’s a digital paper trail of who did what and when making it indispensable for document editing and collaboration.
Picture yourself working on a report alongside multiple stakeholders. With track changes, every contributor can make edits that are easily identified and credited. This openness guarantees that revisions can be examined, approved, or declined by the document owner or other collaborators, ensuring a strong grip on the result.
How to turn on Track Changes in Word
Getting started with this feature is straightforward. To turn on track changes in Word, simply navigate to the “Review” tab on the ribbon. Here, you’ll find the “Track Changes” button. Click it, and you’ll activate the tracking feature. You can also use the same button to turn off tracking changes in Word. Alternatively, you can use the keyboard shortcut Ctrl + Shift + E to toggle the Track Changes feature on or off.

Once it’s activated, any change you make to the document will be highlighted. This includes text insertion, deletion, and even formatting changes. Each contributor’s changes may appear in a different color, making it clear who made which edits.
Also read: The Essential Types of Editing Every Writer Needs to Know
How to Track Changes in MS Word
Step 1: Open your document and locate the review tab
Firstly, open your Word document. Ensure you have the document where Track Changes have been made. On the Ribbon at the top of the Word window, click on the “Review” tab. This tab contains all the tools you need for reviewing documents, including everything related to Track Changes.
Step 2: Enable Track Changes (if not already enabled)
If Track Changes is not already enabled, you can turn it on to start tracking changes from this point onward. To view existing changes, it doesn’t need to be turned on. However, to ensure that you can see all changes made by others before you received the document, it’s good to check if Track Changes is active:
- Look for the “Track Changes” button in the “Tracking” group on the Review tab.
- Click on the “Track Changes” button to toggle it on or off. When it’s highlighted, it’s active.
Step 3: Use the display for review options
Within the “Tracking” group, you’ll find a dropdown menu called “Display for Review.” This controls how tracked changes and comments are displayed. You have several options:
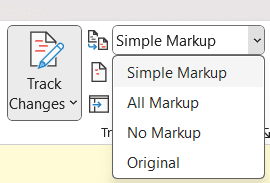
Simple Markup: This shows the final version without inline markups; changes are indicated with a red line in the margin.

All Markup: This displays all edits with inline markups, such as strikethroughs for deletions and underlining for additions.

No Markup: This displays the document as it would appear with all changes accepted, hiding the tracked changes.

Original: This shows the original document before any changes were made.

Step 4: Navigate through the changes
To review each change one by one:
- Use the “Next” and “Previous” buttons in the “Changes” group to jump from one edit to the next.
- As you select each change, you can choose to accept or reject it immediately if you are in the process of reviewing.
Step 5: Show markup options
If you want to customize what types of changes are displayed or hidden:
- Click on “Show Markup” in the “Tracking” group.
- You can choose to show or hide “Comments”, “Ink”, “Insertions”, “Deletions”, “Formatting”, and specific “Reviewers” if there are multiple collaborators.
Step 6: Reviewing changes
As you go through the document, you can add, delete, or reply to comments if needed. To do so, right-click on the comment and choose the appropriate action.
Step 7: Balloons
Word also gives you the option to view changes in balloons in the margins of the document. To use this feature:
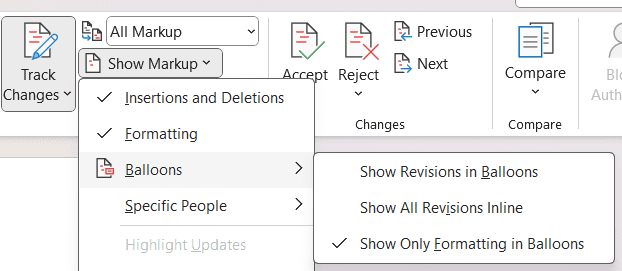
- Go to “Show Markup” and hover over “Balloons.”
- You can choose “Show Revisions in Balloons” to display changes in the margin, which can make the document easier to read if there are many changes.
Step 8: Print with Track Changes
If you need a physical copy of the document with all changes and comments:
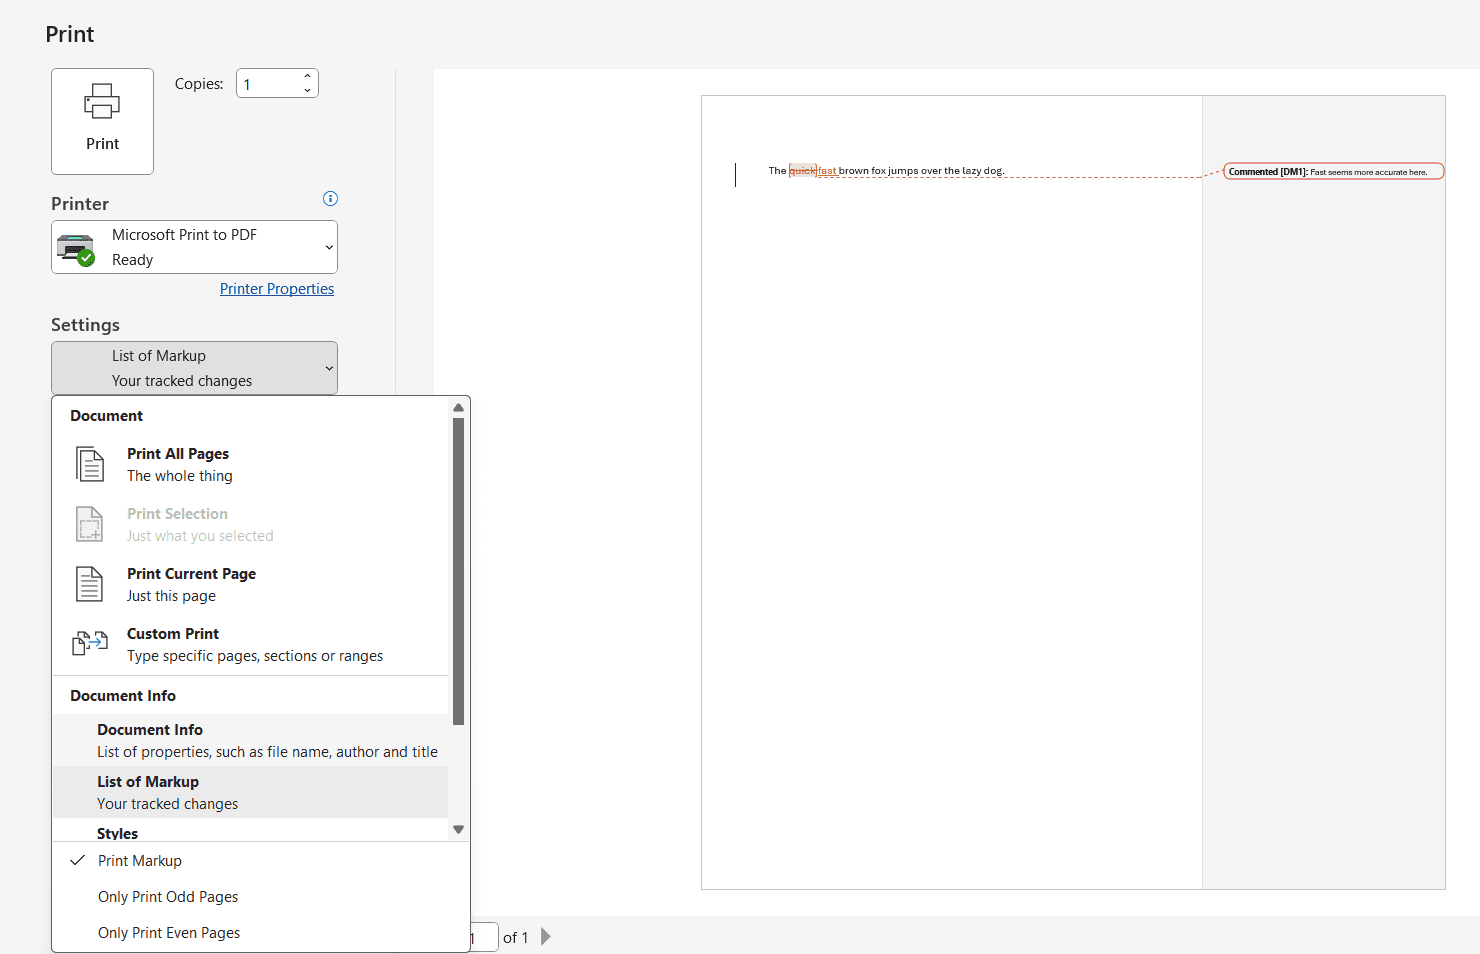
- Go to “File” and then “Print.”
- In the “Print” settings, you can choose to print “All Pages” with “List of Markup” to have all tracked changes and comments printed alongside your document.
Step 9: Finalizing the document
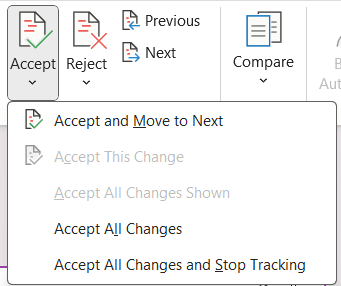
Once all changes have been reviewed, you may want to finalize the document by accepting all changes:
- Click on the “Accept” dropdown in the “Changes” group and choose “Accept All Changes.”
How to use track changes in Word
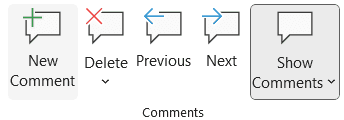
To provide feedback in the document without altering the text, select the text you wish to comment on using your mouse, then click on “New Comment” located in the “Review” tab. This action will generate a bubble in the document margin, displaying your name and an assigned color. Once the comment bubble appears, simply type your feedback.
For responding to a comment, click on “Reply” attached to the comment you wish to address, and enter your response. You can exit the comment bubble by clicking anywhere outside of it once you’ve finished.
Also read: 10 Best Content Editing Tools and Software (Free + Paid)
How to use the Reviewing Pane feature in Word
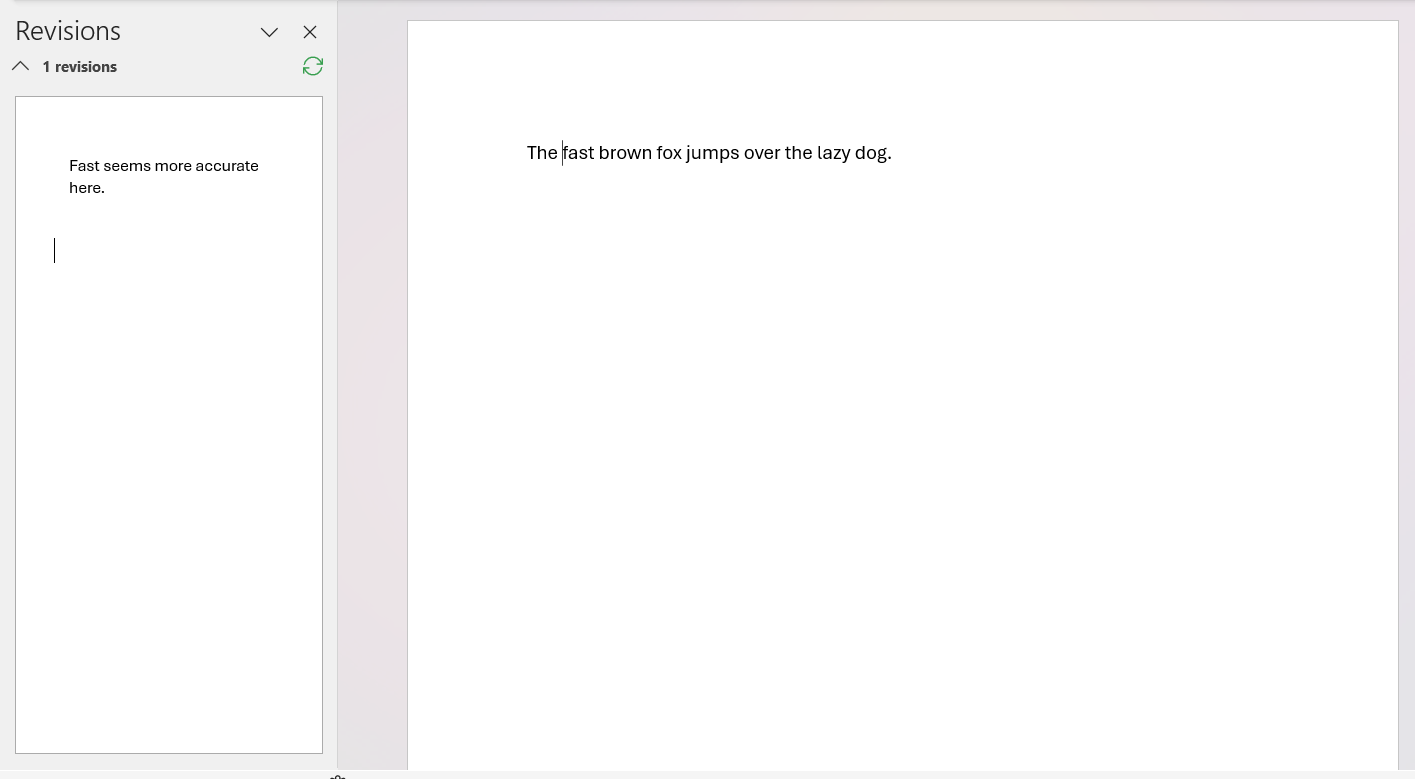
To examine all the modifications made to your document in a systematic manner, you can utilize the “Reviewing Pane”. Located beside the Track Changes button, simply click “Reviewing Pane” to access it. Depending on your screen layout preference, you can opt for either the “Vertical” or “Horizontal” positioning of the pane.
Once selected, the “Reviewing Pane” will emerge, displaying a comprehensive list of all alterations and comments within the document. Additionally, the total count of changes will be visible at the top of the “Reviewing Pane”. To exit the Reviewing Pane, simply click “Reviewing Pane” again.
How to hide Track Changes in Word
Sometimes, you may want to hide track changes in Word for a cleaner view as you edit. To do this,
- Go to the “Review” tab, and in the “Tracking” group, click on “Show Markup.”
- Here you can choose to hide various types of markup like comments, formatting, and specific reviewers’ changes temporarily without removing them.
How to remove Track Changes in Word
After reviewing edits, you might wonder how to remove Track Changes in Word. Accepting all changes is the most straightforward method to clean up the document. However, to ensure no traces remain, you might need to inspect the document. Go to “File,” select “Info,” then click on “Check for Issues” and choose “Inspect Document.” This will remove any hidden metadata associated with the changes.
How to disable Track Changes in Word
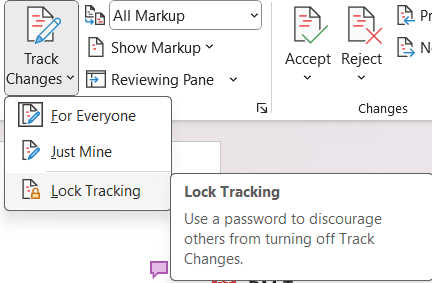
If you’re looking for a way to prevent further changes from being tracked, you can lock the feature by clicking on “Track Changes” and selecting “Lock Tracking.” This will require a password to turn tracking on or off, ensuring that no changes go unmonitored.
 Now that you’ve got the lowdown on enabling, utilizing, and clearing track changes in Word, you’re all set to tackle any document revisions like a pro. So, dive into your next group project with gusto, knowing that Track Changes from Microsoft Word will have your back every step of the way.
If you ever need an extra set of eyes to polish your document to perfection, don’t forget about PaperTrue’s expert editing and proofreading services. Our team of professionals is here to help make your writing shine!
Keep reading for more useful resources:

Tanvi

With a foundation in Life Sciences, Tanvi enjoys curating technical writing tips tailored for ESL students. When she's not translating complex concepts into bite-sized nuggets, she can be found playing with dogs or painting landscapes.
4 comments on “How To Track Changes In Word: Accept, Hide & Disable Changes”
Comments are closed.




Excellent blog, man.
You made some decent points there. I looked on-line for the issue and located most people should go along with along with your internet site.
Thank you for the great information. I like your blog very much, added it to my follow list.
I like your website very much, the explanations are very clear and simple
Goodbye, love and respect.